Shop Administration
Overview

Permissions
To access the Canteen/Shop Management module, staff require either the CanteenAdmin or CanteenPower permission.
For more information on permissions in Compass, please refer to the 'Individual Permissions' article from our Knowledge Base.
Shop Management Page
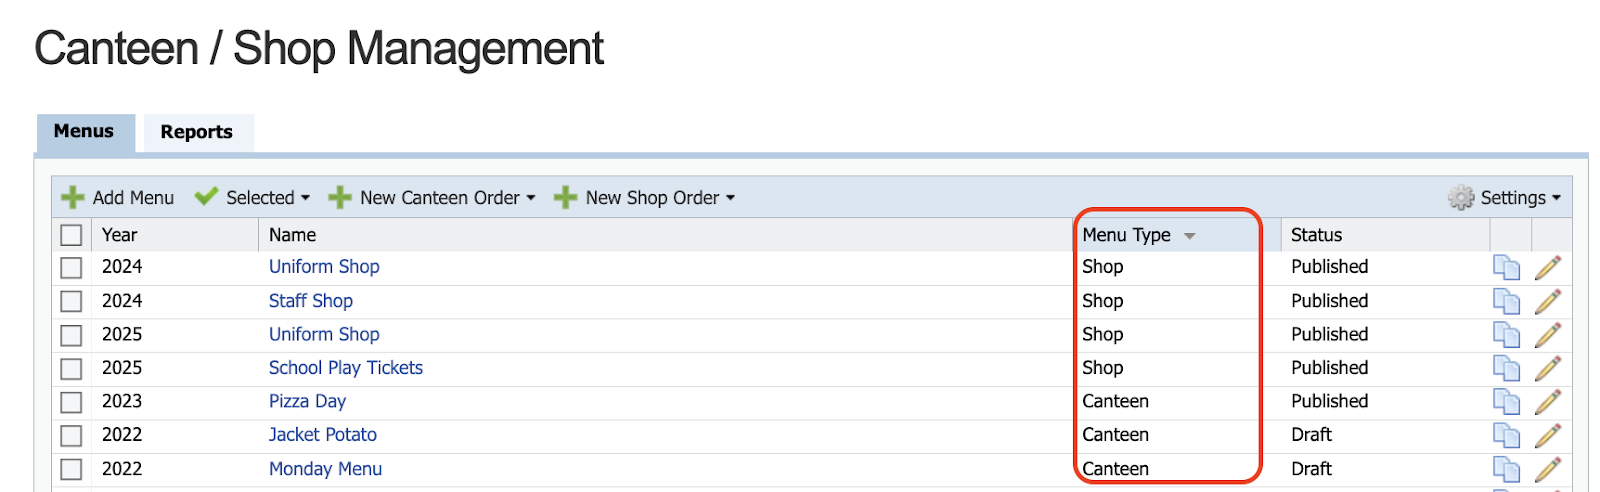
Within the Canteen/Shop Management module, you will see a tab containing any menus that have been created at your school, including those created as Canteen menus. Under the 'Menu Type' column, you can distinguish between Shop and Canteen.
Create your Shop Menu
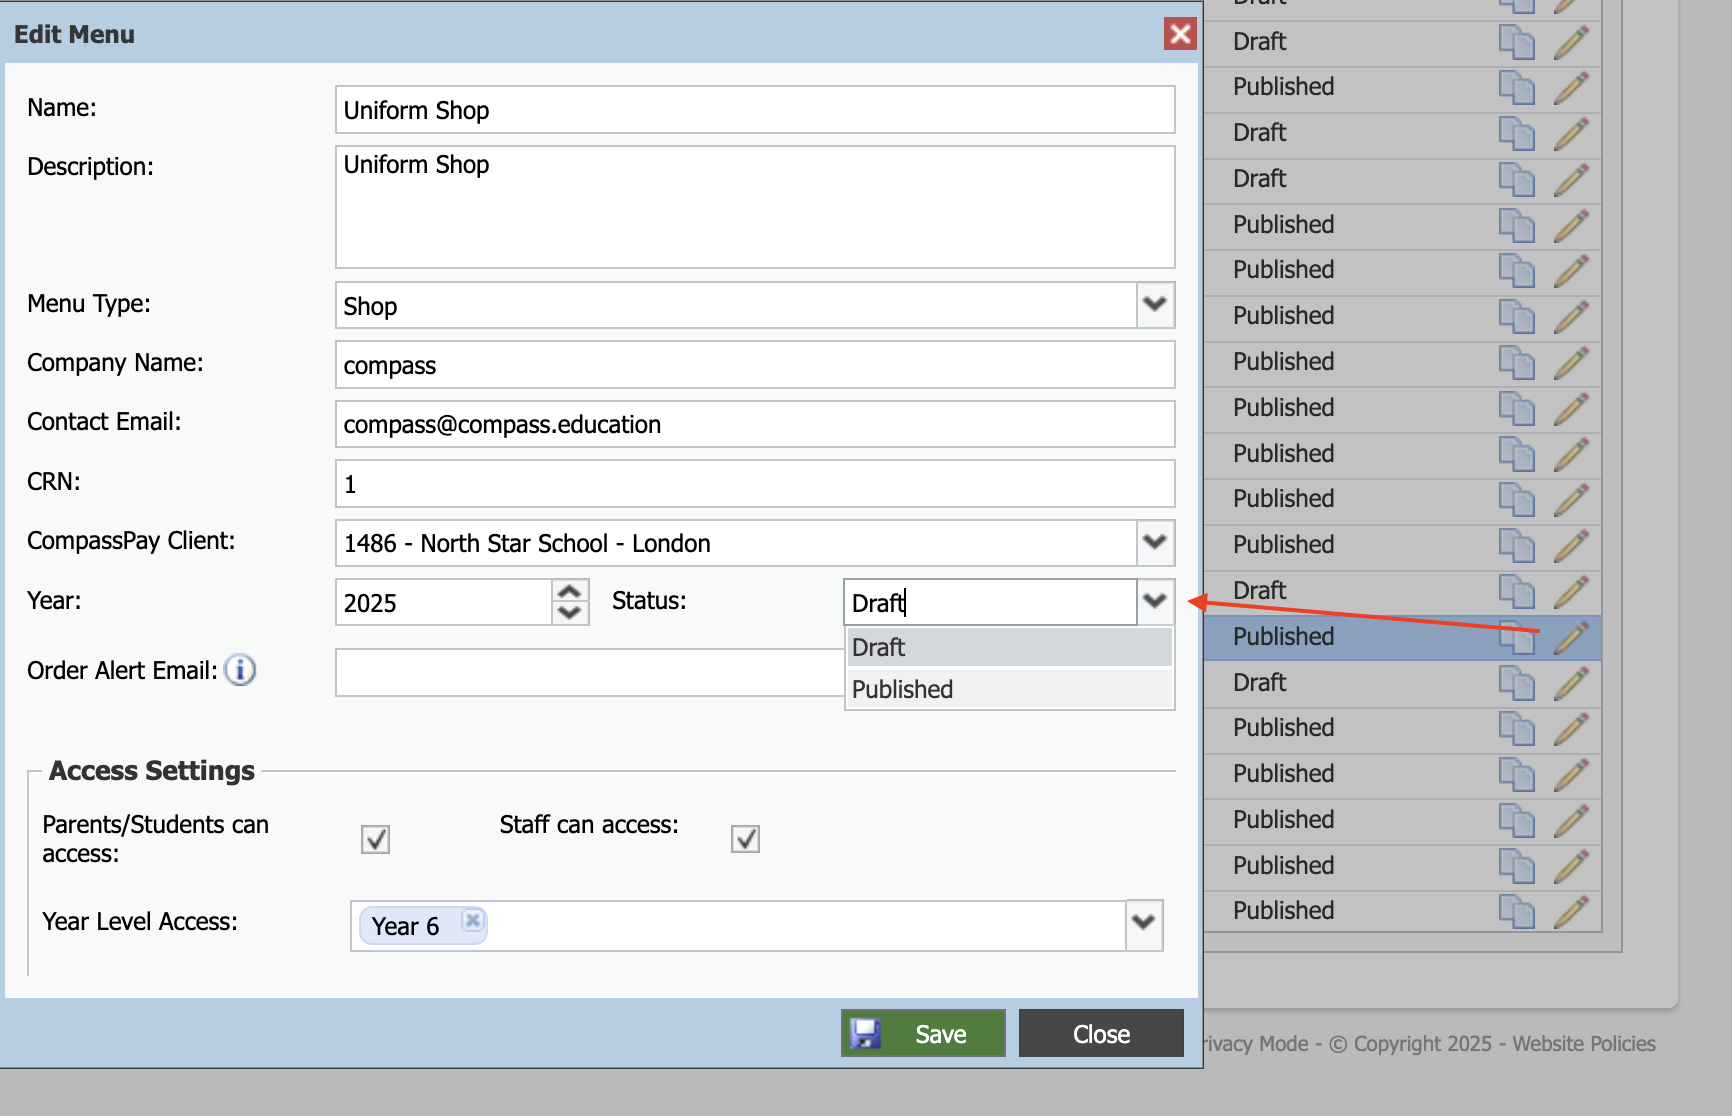
From the Canteen/Shop Management page, within 'Menus' click ‘+Add Menu’ to create your Shop.

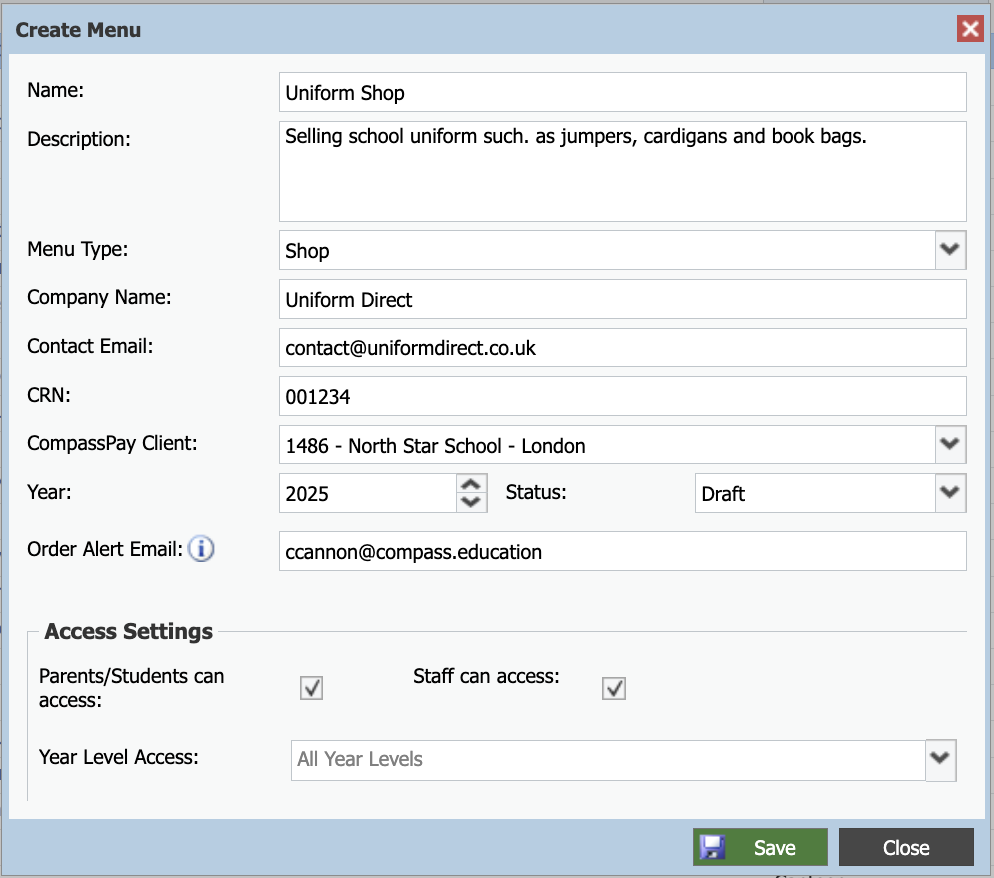
Name | Shop name visible to parents/staff e.g. Uniform Shop, Staff Shop etc |
Description | Type a description of the shop and items available |
Menu Type | Shop |
Company Name | Add the service provider (if not external simply add School Name) |
Contact Email | Add a contact email for your service provider, if applicable |
CRN | Add the company registration number for your service provider |
CompassPay Client | Select your CompassPayClient from the drop down |
Year | Set the year that the menu will be available in |
Status | Defaults to 'Draft', change to 'Published' when live |
Order Alert Email | Type a staff member’s email address to receive email notifications when an order is placed |
Access Settings | Parents/Students can access: Tick if applicable Staff can access: Tick if applicable Year Level Access: Leave blank for all year levels, otherwise specify the year levels |
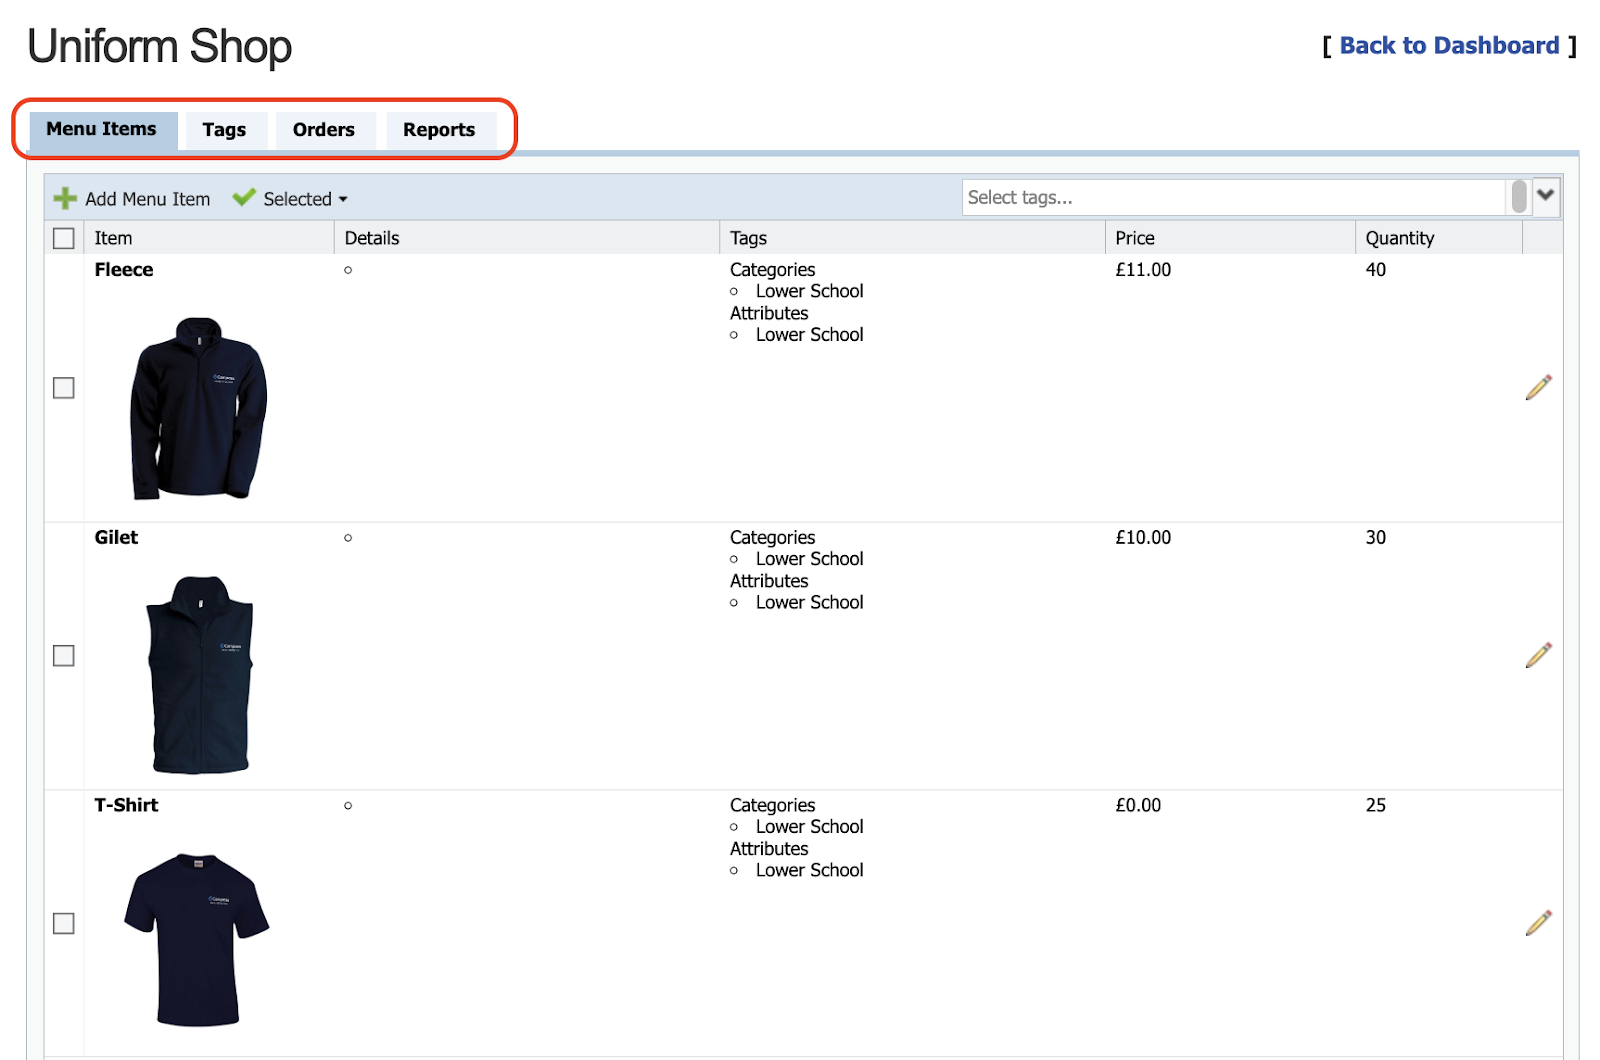
Menu Items Tab
On this tab, you can add/manage the items available in this shop.
To list an item for sale, click ‘+Add Menu Item’ and complete the item details in the pop-up window:
Name | Name of the item for sale |
Description | Additional information about the item |
Sale Price | The selling price of the item (what the customer pays) |
Cost Price | The price that the item costs your school (what the business pays) Note: VAT will be included on receipts unless ‘N/A: doesn’t attract VAT’ is selected from the drop down menu |
Set Quantity Available | Tick if there is a set number available for sale |
Quantity Available | Type number available |
Tags | Choose the applicable tag or tags for this item from your available list |
Options | Click ‘Add’ if you wish to configure different options for this item e.g. sizes. Add additional costs if necessary. |
Parents/Students/Staff Can Order | Tick which users can order this item |

Edit an existing Item
To edit the image of an item, click the edit pencil icon to open the item, double-click the image area, select the image file from your device and upload.
To remove the image of an item, click the edit pencil icon to open the item, click the image area and click 'Remove'.
To archive items from the menu, select the item (or items) and click the 'Selected' button, then choose 'Archive'.

Tags Tab
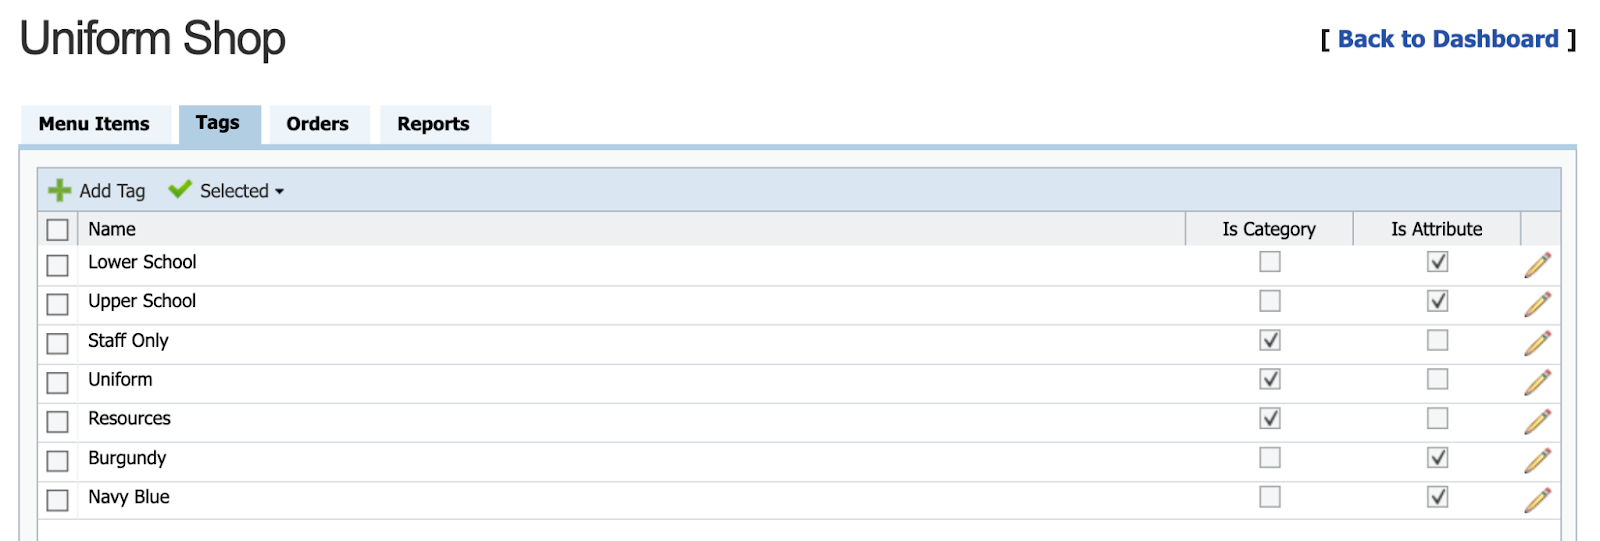
To add a Tag, click the 'Add Tag' button. In the pop-up give the Tag a name and then tick the applicable box to define the Tag as a Category or an Attribute.

Selecting ‘Category’ allows the user to filter for this particular tag within the shop e.g. Uniform or Resources
Edit an exiting Tag
 To share your Shop menu, ensure you update the Status of the menu from 'Draft' to 'Publish' from the Canteen/Shop Management module dashboard using the pencil icon.
Shop Management
Orders Tab
Selected Orders menu
- Mark as Completed: Used for internal processes to track when an order has been fulfilled. This will change the status to 'Completed' and will be visible in the Parent Portal
- Mark as Pending: This is the default status for orders. Return an order to pending if accidentally updated to 'Completed'
- Mark as Cancelled: Cancel this order (may include multiple items) and provide a reason
- Bulk Cancel Order Items: Used to cancel all orders for a specific item for example if you have run out of T-Shirts and pending orders need to be cancelled *See below for more details
- Print Order Receipts: If you have a printer connected and would like a paper receipt
- Generate Orders Report: A PDF report of orders from this menu. A pop-up window will prompt a grouping option for the report for example grouped by Year Level, Form Group or no preferred grouping
- Generate Orders Report CSV: Report as above in CSV format
- Generate Orders Quantity Report: A PDF report of pending action / completed orders. This will display as a page per order date.
- Generate Order Labels: A PDF file with orders split into labels for printing onto label paper.
Advanced Filter
Reports Tab
Reports menu
- Transaction Summary: A PDF export of total transactions, allowances and discounts and a breakdown of each transaction and cost
- Stock Item Financial Analysis: CSV document per menu item: cost price, sale price, sale revenue & item profit
- Order Payment Method Report: CSV document containing student name, order items, payment method used and form group & year level
- Daily Summary: CSV document containing overall figures of sales
- Canteen Financial Report: CSV document of student names, items purchased, cost price, sale price and profit
- Allowance Report: RELEVANT ONLY FOR CANTEEN MENUS
- Canteen End of Day Summary: PDF total of items ordered for the day included breakdown of staff vs students and payment method
Consolidated Reports
- Stock Item Financial Analysis
- Order Payment Method Report
- Daily Summary
- Allowance Report